|
Exercise to draw a ceiling connection using SYSCAD commands.
Download the drawing for the exercise here
In addition to the help in text form, you will find small summarising videos in the appropriate places.
Watch out for this Symbol: 
|
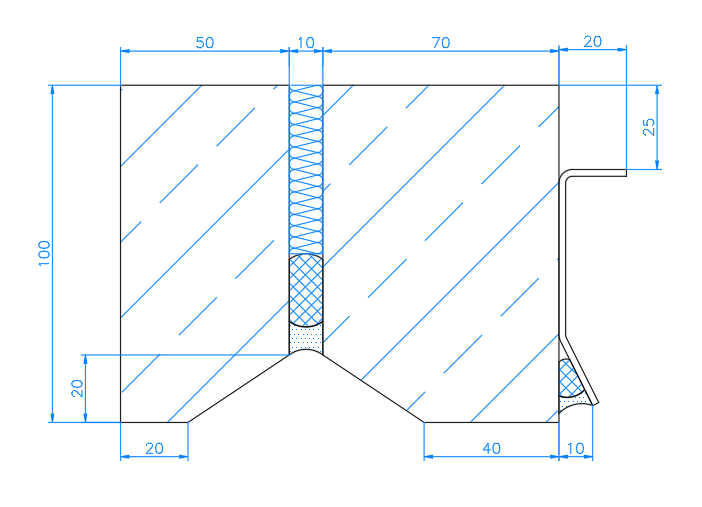
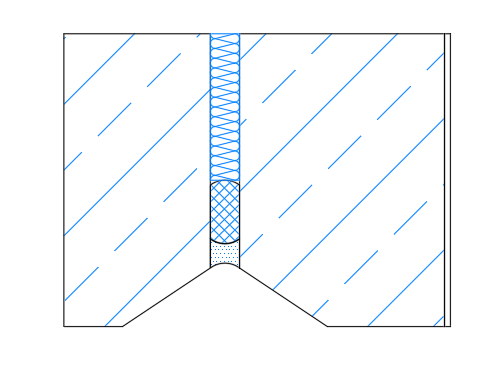
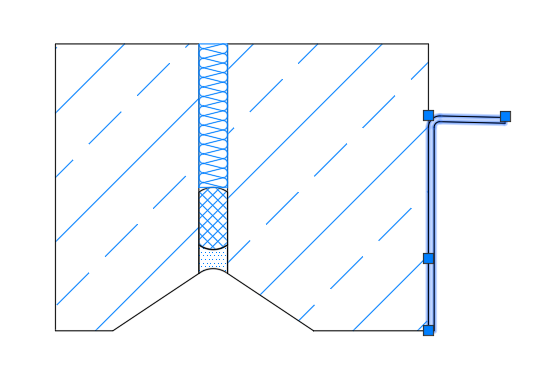
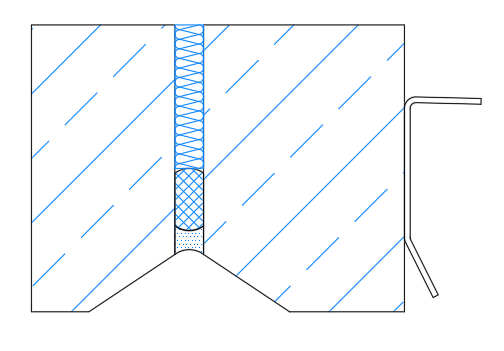
Desired result
|
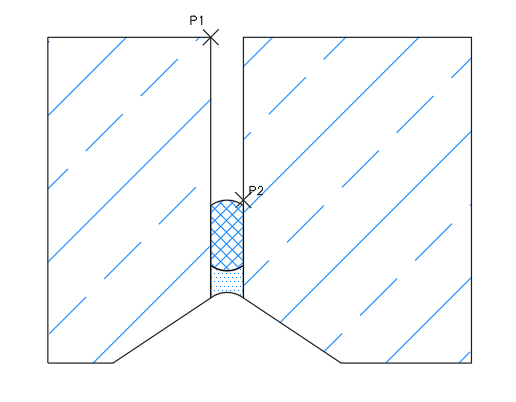
Use the Foamed tape with sealing rectangular  command to draw the sealing between the two concrete elements. command to draw the sealing between the two concrete elements.
|
Command:
First point: Click on P1
Point2 or <Return> for typing width x height Click on P2
Point for direction / Depth or <Return> for O.K.: Click the left mouse button until you are satisfied with the position of the seal. Then click the right mouse button to confirm.
Hatch style <DOTS>
Factor <0.8>
Hatch style <ANSI37>
Factor <0.8>
|
|
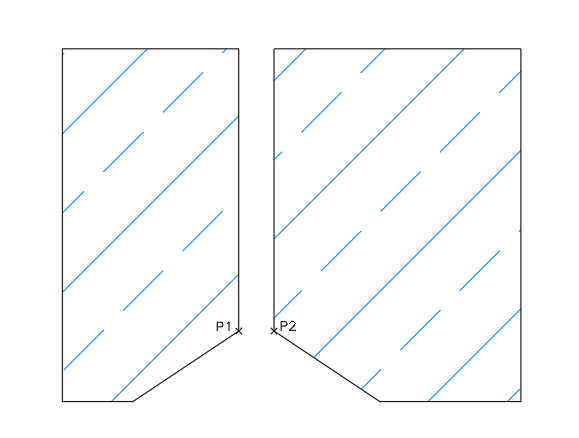
Now draw the insulation with the Insulation soft  command. command.
Command:
First corner or <RETURN> for non rectangular object Click on P1
2nd point Click on P2 with entity snap quadrant / perpendicular / snap tracking
|

|
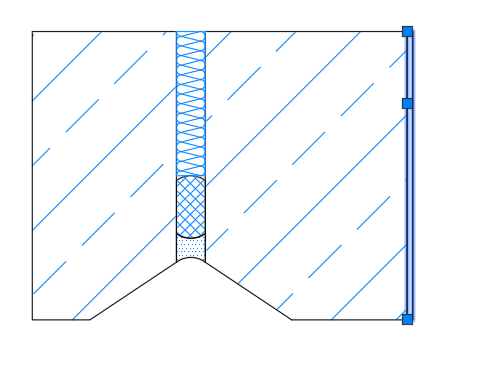
Now draw a sheet on the right-hand side using the Sheet  command. command.
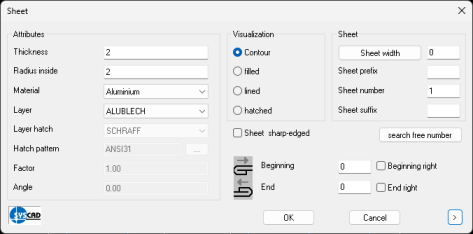
Select the parameters as shown and start with OK
Command:
First point : Click on P1
Next point : Click on P2
Direction or <ENTER> for mid Click to the right in the free drawing area.
Next point : Confirm with the right mouse button.
|
|
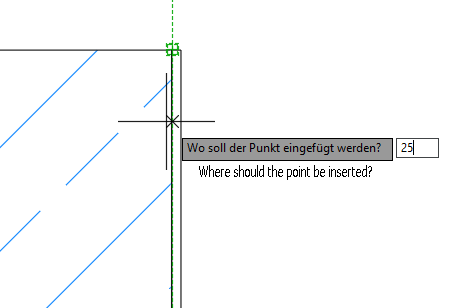
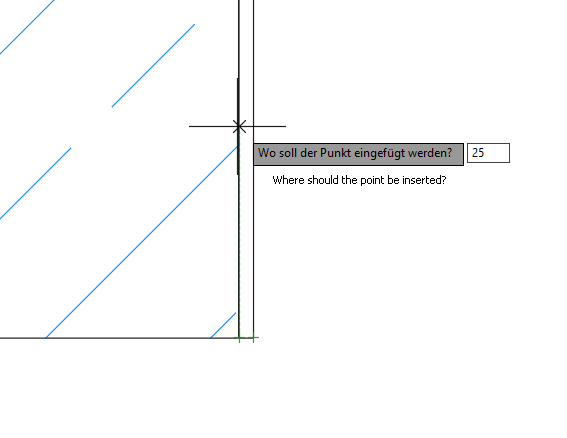
The sheet metal is now modified. We first insert a new bending point at the top at a distance of 25 mm.
To do this, use the Insert Point  command. command.
Command:
Select SYSCAD object: Click on the sheet
Where should the point be inserted? Move the mouse over the upper edge point until the track point display or the text END POINT appears. Then move the mouse vertically downwards and enter 25. Confirm
|
|
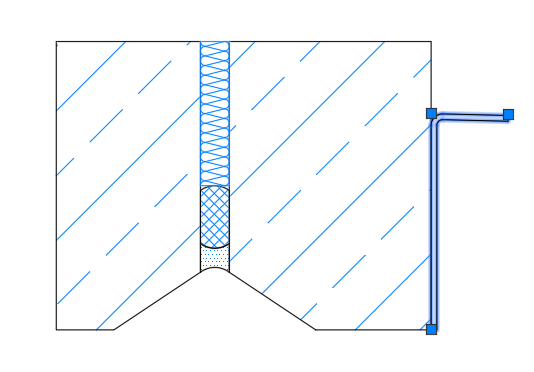
The sheet now has three handles. Activate the top handle and pull it first orthogonally 20 to the right and then 25 downwards.
|
|
The sheet metal is now also modified at the bottom edge. We insert a new bending point at the bottom at a distance of 25 mm.
To do this, use the Insert Point command.
Command:
Select SYSCAD object: Click on the sheet
Where should the point be inserted? Move over the lower edge point until the track point display or the text END POINT appears. Then move the mouse vertically upwards and enter 25. Confirm
|
|
The plate now has 4 handles. Activate the lower handle and pull it orthogonally 10 mm to the right and 5 mm upwards
|
|
Done. And without the need of any auxiliary lines.
|
|
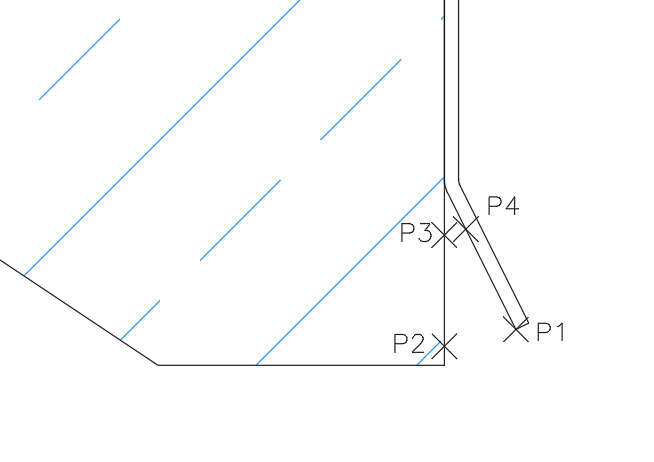
Use the command Foamed tape with sealing  to draw the seal between the sheet metal and the concrete part. . to draw the seal between the sheet metal and the concrete part. .
Command:
Outer sealing from point Click on P1
to point : Click on P2 with entity snap NEAREST
Sealing / Backing cord to point _nearest Click on P3 with object snap NEAREST
ealing / Backing cord to point or <ENTER> for parallel sides Click on P4 with object snap NEXT
|
|
Here you can see our desired result.
|
| 

